GitHub Copliot X for iOS - building a simple Hacker News reader from scratch, part 1
In the series, I will build a simple Hacker News reader for iOS using Firebase, SwiftUI and GitHub Copilot X. In this first session, I tackle the following:
- Setup and configure VSCode Insiders
- Install and configure GitHub Copilot Nightly
- Setup Firebase for iOS leveraging GitHub Copilot Chat
I was added to the GitHub Copilot Chat technical preview and will share my experiences with Copilot Chat and Copilot in general. Since Copilot Chat is currently only available in VSCode, I will also be learning VSCode in addition to being new to Swift UI and iOS app programming!
Finally, I have chosen to only lightly edit the videos (“Unscripted Programming”) as I believe it’s important for people to understand what programming is really like for two primary reasons:
- For devs, we often watch either highly edits programming videos where nearly everything goes smoothly or we’re watching incredibly senior developers. It can be very intimidating to then code on your own and it’s quite easy to fall into imposter syndrome. I hope to dispel that myth!
- For non-devs, I think it’s really powerful to understand what programming is really like. This can help business owners, product managers, security experts and more. And hey, maybe there are folks that are interested in programming and this will help them dive in.
1. Setup and configure VSCode Insiders
I was excited to get my invite to the Copilot X private beta! Here’s the instructions they provided for VSCode:
For Visual Studio Code:
- Download and install Visual Studio Code - Insiders
Already on the Insiders build? Make sure you are on the latest version! - In VS Code Insiders, go to the Extensions tab (Cmd+Shift+X) in the activity panel and search for and install the GitHub Copilot Nightly extension.
If you have not previously authorized VS Code Insiders in your GitHub account, follow the steps to do so, you will be prompted to sign in. - A new Chat icon appears in the activity panel. Click on it to see the conversation interface.
If that doesn’t work, restart the editor and authorize GitHub Copilot to see the chat window.
Installing VSCode on macOS is almost as simple as downloading it but for autoupdate to work, make sure you move the app for an appropriate directory. I chose to move it to the Applications directory.
2. Install and configure GitHub Copilot Nightly
While this was pretty straight forward, VSCode was a bit visually overwhelming compared to neovim. I hit a few minor snags which were pretty easy to resolve or punt:
- Check for VSCode updates in the “Code - Insiders” menu and restart as needed
- Initially I installed GitHub Copilot extension but that conflicts with the GitHub Copilot Nightly so you have to uninstall it and restart
- I tried to configure support for Swift via extension but it was more involved than I wanted so I punted
- I would love vim bindings and I know that will be easy but again chose to punt
- After installing GitHub Copilot Nightly extension, there’s a GitHub Chat icon that will open a chat window
3. Setup Firebase for iOS leveraging GitHub Copilot Chat
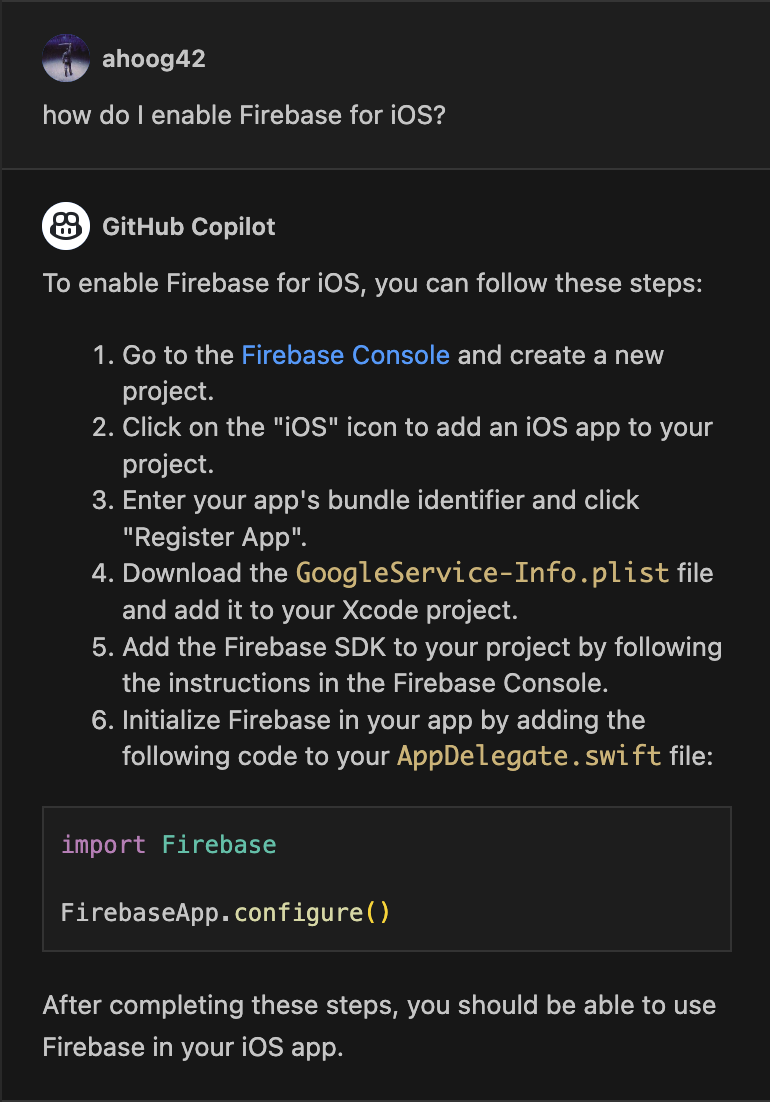
Once I opened up my iOS project, I wanted to install and configure Firebase for iOS so here was my question and the response:

This directions are spot on for a UIKit iOS app but there’s a slight tweak you need for a SwiftUI since there isn’t an AppDelegate.swift file. I had already noticed this from some blogs and repos I checked out and when I was following the steps on the Firebase website, they also had the correct code syntax for SwiftUI. I probably could have asked Copilot Chat but this is a new process for me so I’m still getting used to having an AI copilot always available! :-)
4. GitHub Copilot X - first impressions
My first experience with GitHub Copilot Chat was very positive. While I had some basic familiarity with SwiftUI and Firebase, it was very convenient to ask Copilot Chat how to install the SDK for an iOS and have the instructions in VSCode.
I was able to install and configure the dependencies and ultimately have the app build and run. Since this was my first time using VSCode, I ran into an issue copying vs. moving a key config plist but that wasn’t too hard to resolve.
I felt that VSCode and Xcode worked pretty well together once I realized you have to save files in VSCode. :-)
A lot of the time in this video was spent looking up which Firebase libraries I needed and things of that sort.
I’ve already recoded the next three parts and will share them soon.
- Part 2: Build out Models and a ViewModel, attempt to connect to the HN API
- Part 3: Successfully connect to the HN API and fetch the top stories.
- Part 4: Developer housekeeping